Picking horizons is one of the most useful things to do for interpreting seismic data in sedimentary basins. Please find below some tricks based on a very long experience in seismic interpretation using Petrel:
In general:
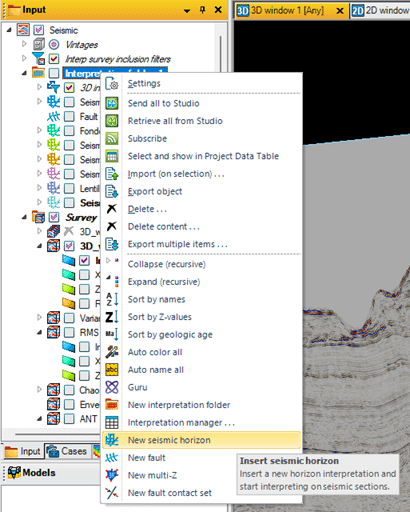
Right click on « interpretation folder » and click on « new seismic horizon »

Right click on the newly created horizon and click « rename » or « settings » to rename it at your convenience.
Depending on the number of horizons you plan to pick, it can be interesting to use the following nomenclature:
001_Seafloor
100_Top_X
200_Top_Y
…
800_Basement
It is then much easier to sort the list by name (right click on interpretation folder and click on sort by name), meaning that the horizons are sorted by stratigraphic order…
Then rick click on the horizon and click « insert interpretation grid ». It means that a XYT file is added to your horizon.
Your are ready to propagate !
In 2D:
There are several ways to propagate horizons in 2D. The best way is to use an interpretation window. Select the horizon.
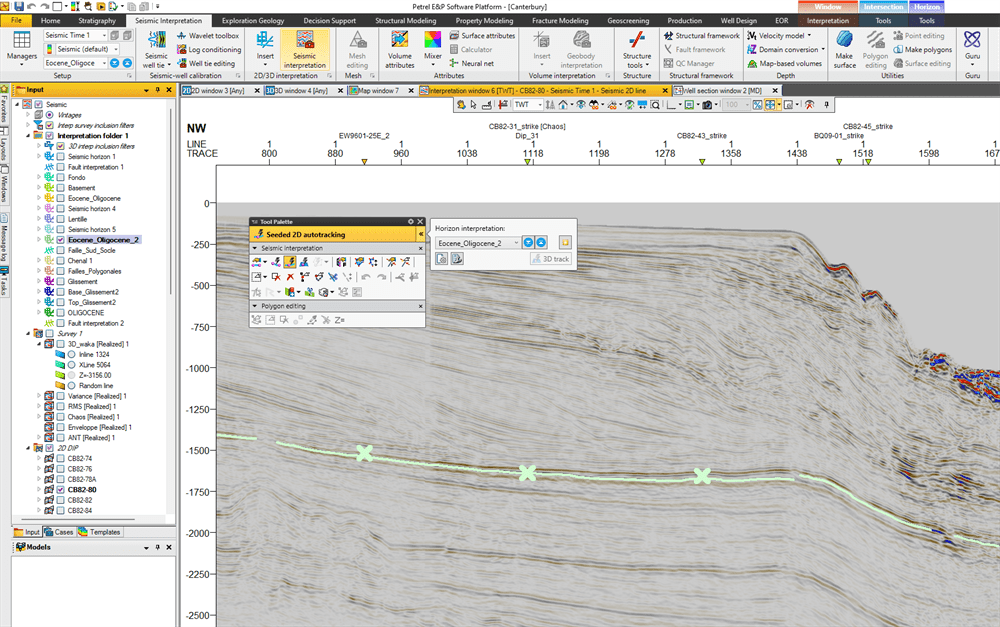
You need to display the propagation tools. On top of the Petrel window, click on seismic interpretation then « seismic interpretation ». In the pop-up window that opens, you can select the horizon you want to propagate and use the 2D seeded autotracking.
WARNING: The horizon is defined by geophysical characteritics, and you must define what you want. peaks or troughs or other events. So, right click on the horizon name in the left pane and click settings. Then select the Autotracking tab:
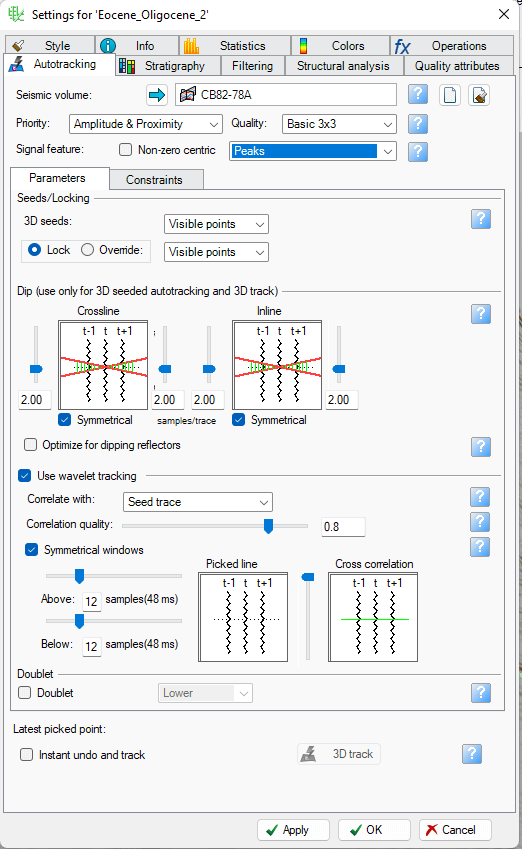
Another very usefull tip is the correlation quality. By default it’s set to 0,8 = 20% of deviation.
So, if your horizon is long and has strong lateral variations in amplitude and wave shape, the propagation will stop fast = on a short distance from the seed point. You can choose to « let go of the bridle » and take a lower correlation quality of 0,5 or 0,4. However, the risk is that the propagation could jump to another horizon. So, changing this parameter is very common during propagation. For example, I’ve already picked an horizon for about one month, 8 hours a day !
At some points you may need to choose « guided autotracking » or « manual interpretation » instead of « 2D seeded autotracking ».
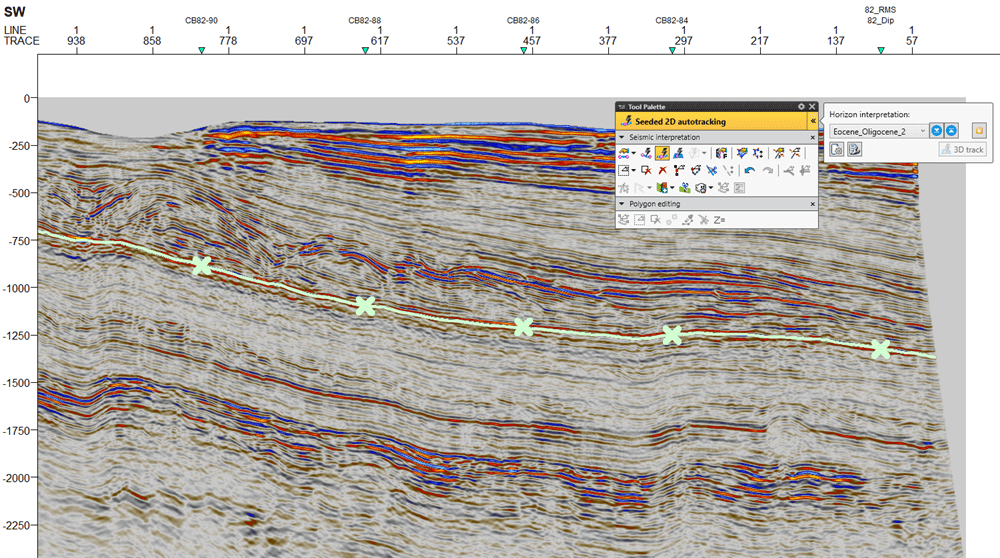
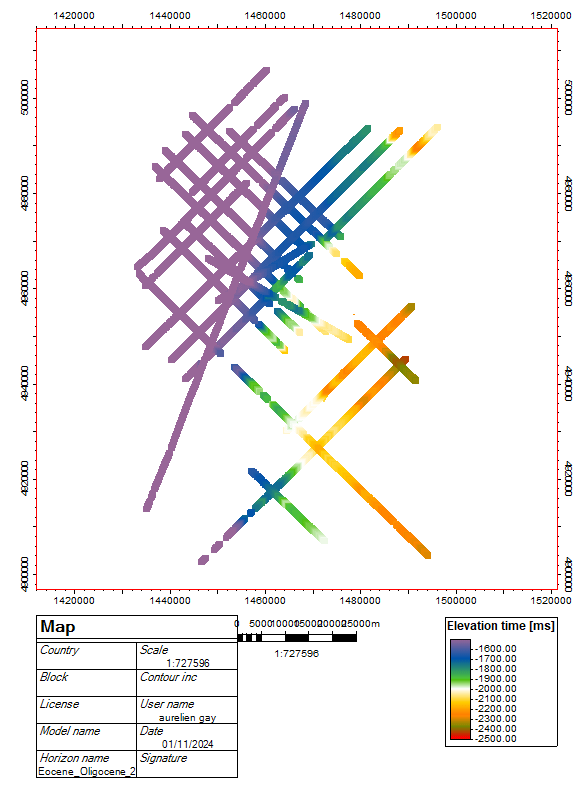
You just click on the horizon you want to pick, and the propagation starts. On 2D seismic it is quite fast. Then you select another seismic profile on the right pane and you click again etc… Please note that cross along the horizon represent your interpretation on a crossing seismic profile. Once done on every profile, the work is finished. You can display your horizon in map view by either selecting the map window or the 2D window.

If you want to get a surface, you must first edit a polygon.
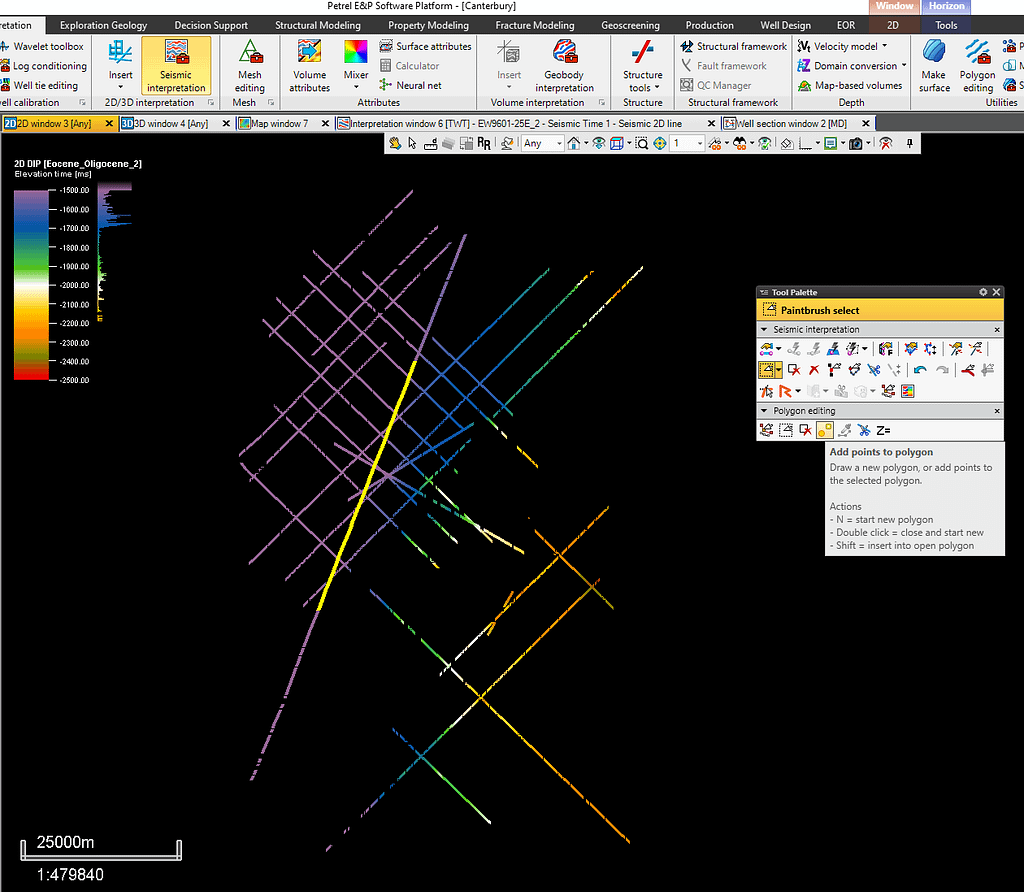
Below the seismic interpretation, the polygon editing tool is displayed. If not, click on the seismic interpretion tab on top of the Petrel window and click on ‘polygon editing ».
In the pop up window select the icon with an orange square and an orange circle and start clicking around the area of interest. Double click when finished.
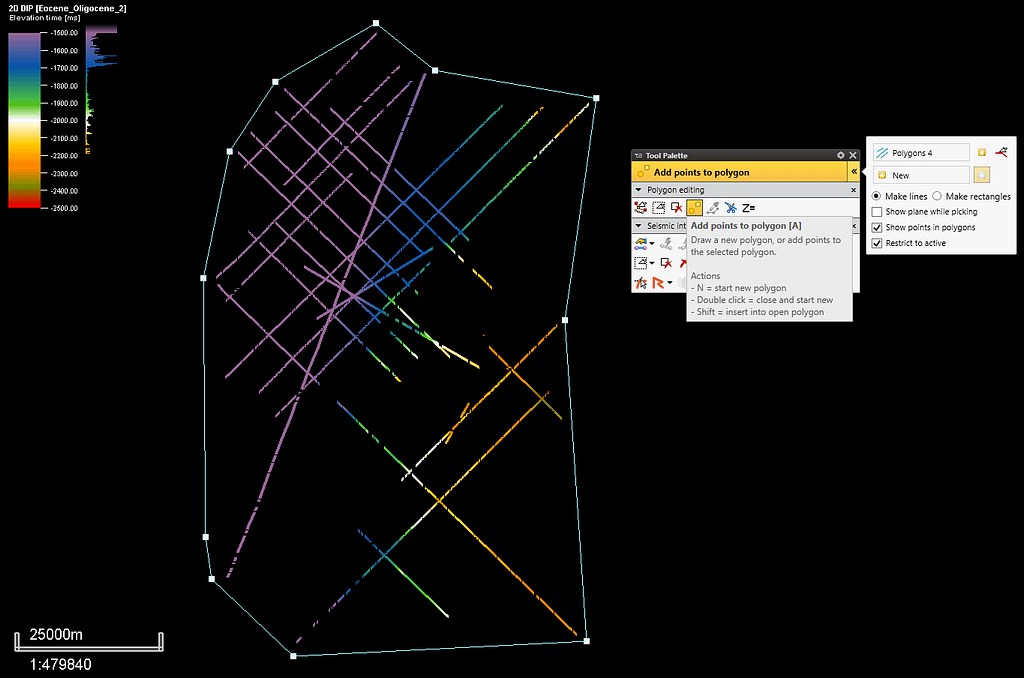
You can rename the polygon by right clicking on its name in the left panel and select « settings ».
To make a surface, click on the seismic interpretation tab on top of the petrel window and click on « make surface » on top right.

In the left panel, click on the horizon and then click on the blue arrow next to « main input ».
In the left panel, click on the polygon and then click on the blue arrow next to « Boundary » and tick the box « use data inside boundary only ».
In the Geometry tab, select « Automatic » and click Apply or Ok.
In the left panel, unselect the horizon and the polygon.
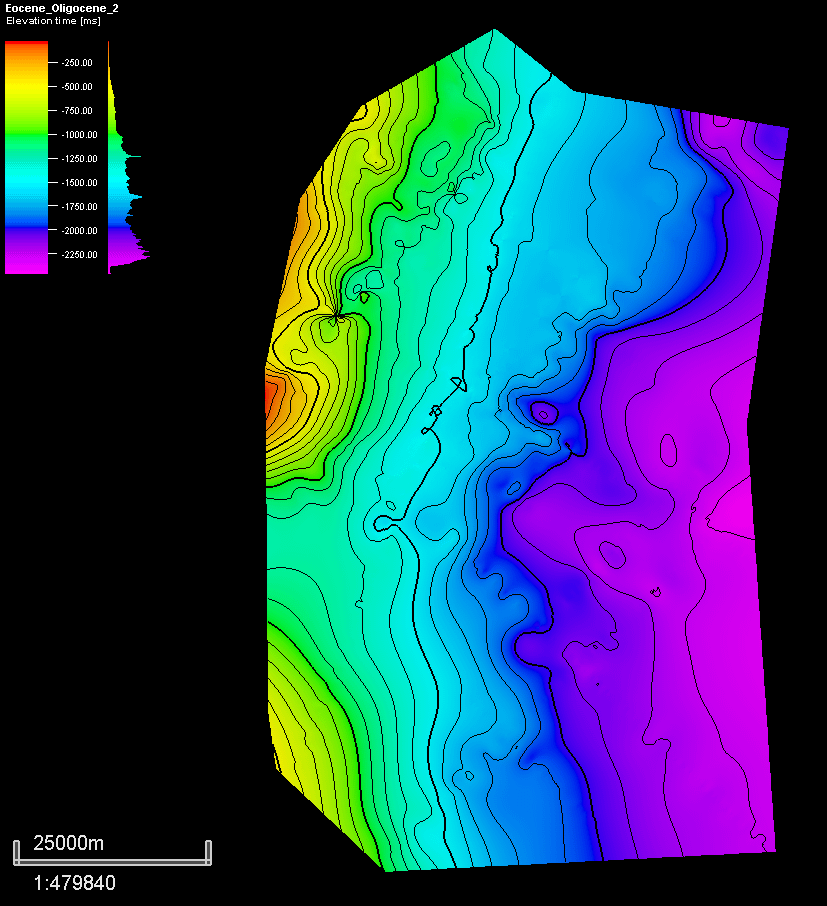
By default contour lines are displayed. You can fix these parameters in the settings tab:

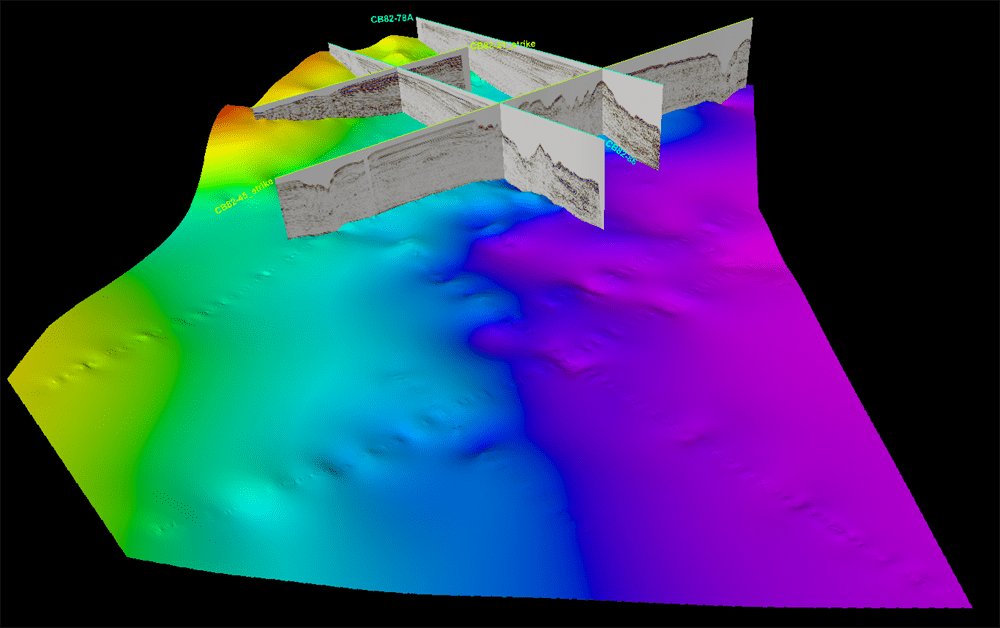
The resulting surface can be displayed in a 3D window with 2D seismic lines
ENJOY !
Retour de ping : Surface Attributes in Petrel – AurelienG