Importing 2D seismic profiles can be a nightmare. First of all, you must determine whether XY coordinates are embebbed in the sgy/segy file or not. You can use for instance seisee or segy detective to visualize binary headers (take a look here: https://radexpro.com/free_utilites/
In segy detective, open the segy file. 3 menus are available. Textual header shows that XY coordinates are supposed to be at bytes 73 and 77 respectively.
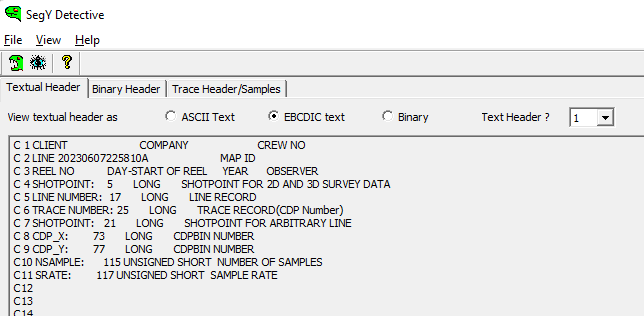
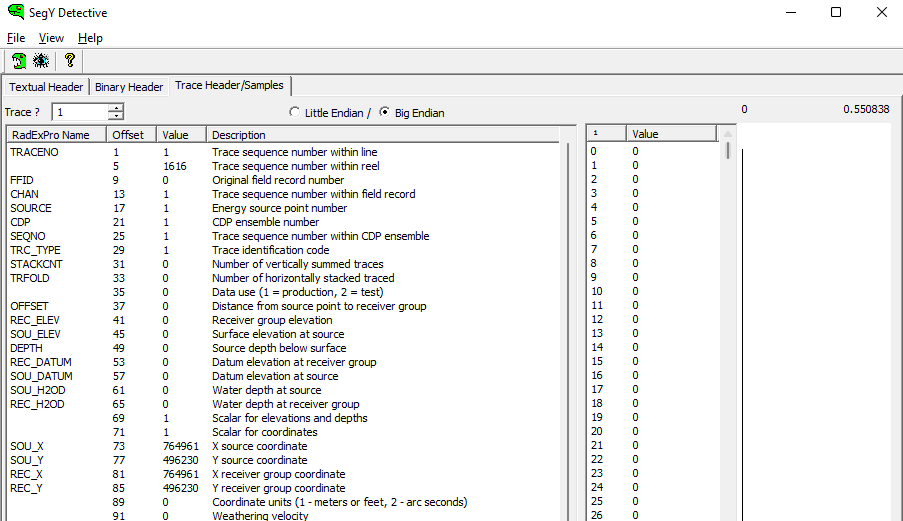
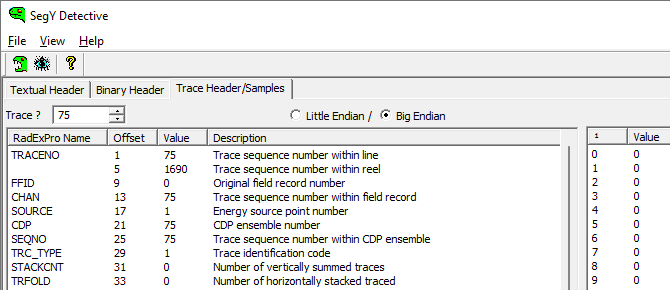
In the menu Trace Header/Samples, the bytes are displayed. Bytes 73 and 77 contain values. However, it doesn’t give you any info on the coordinate system.
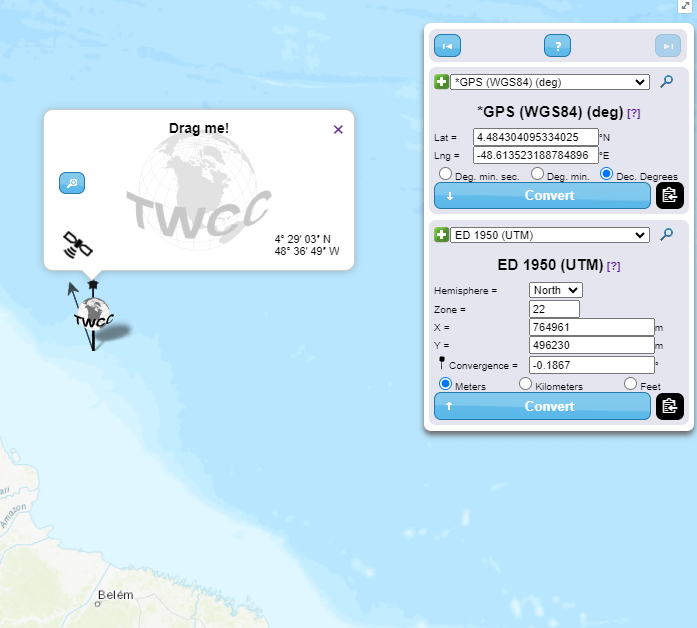
A trick: in the case you know where the seismic has been acquired, it »s quite easy to find the coordinate system using this site: https://twcc.fr/ Just click where you think you are and the system will provide the result in UTM.
COORDINATES ARE IN SEGY:
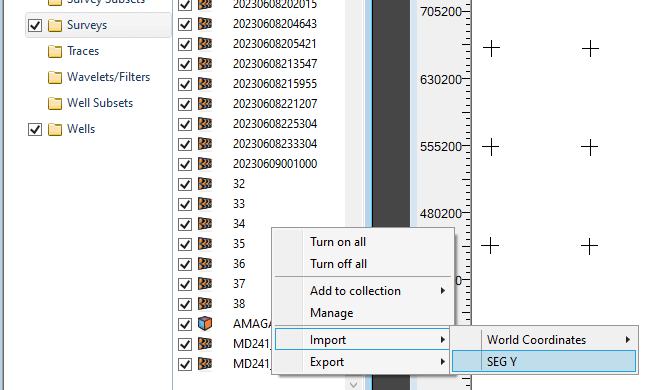
right click in a blank zone in the project tree and select Import-> SEG Y
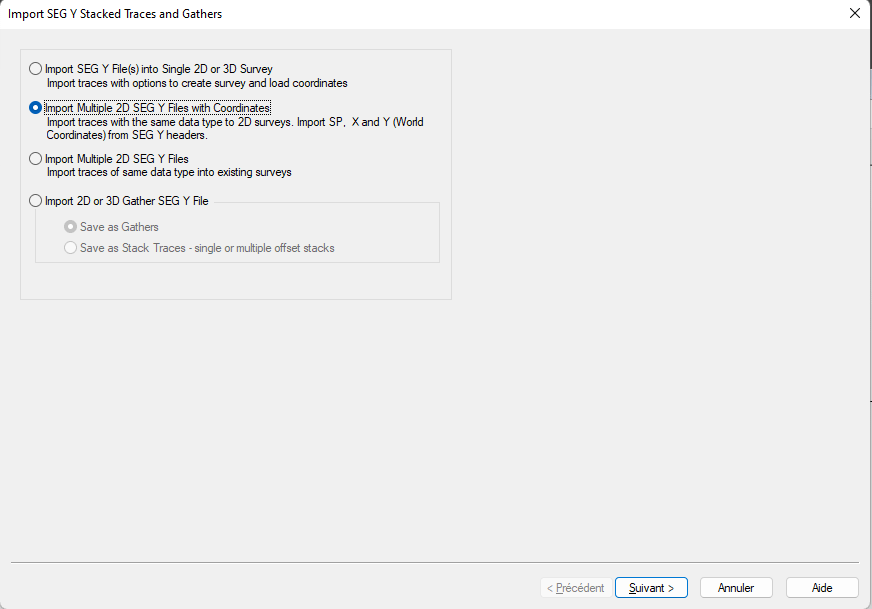
In the window that opens, select Import Multiple 2D SEG Y Files with Coordinates. Click Next.
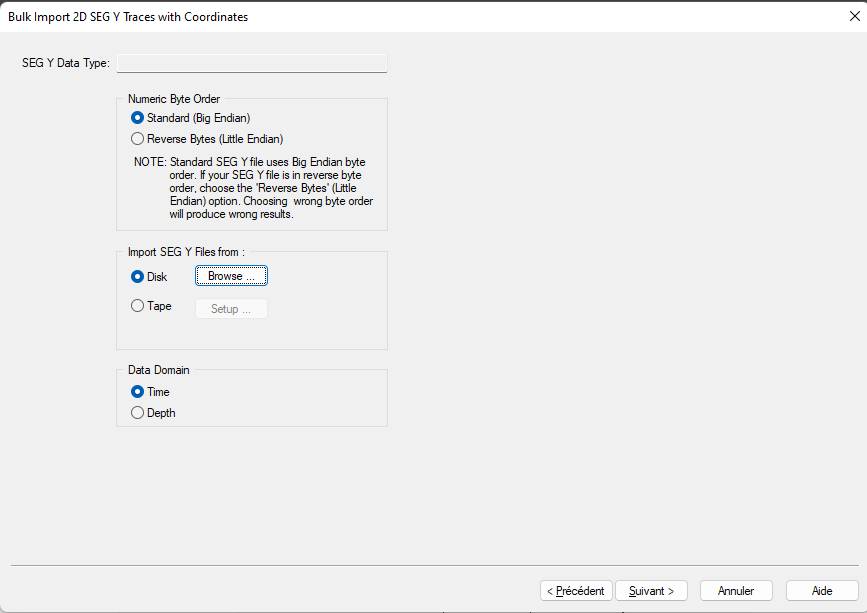
In the window that opens, click Browse to select the segy file and click next
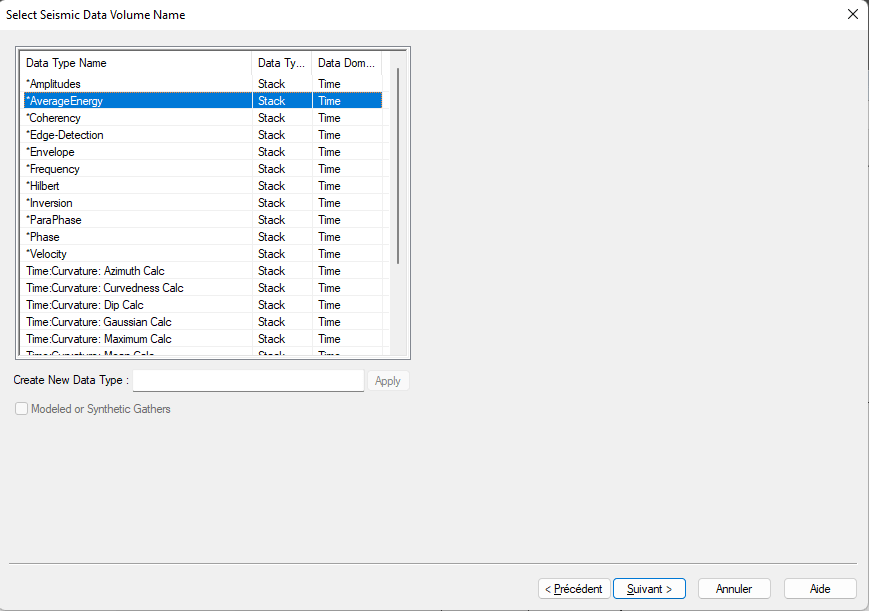
For classical seismic profiles, use amplitude. For CHIRP profiles or Sub-Bottom Profiler, you can use AverageEnergy instead. Then click next.
You must understand how segy files are organized. By default, Kingdom uses standard SEGY files and the shotpoint is set to 17. In our case here, it won’t work. So, check Segy Detective to identify what is the byte containing shotpoints. Use the arrows on top to increase the trace number. Here we are at Trace 76. You can see that the bytes 13, 21 and 25 contain the trace number. The byte 5 contains the shotpoint number.
In the Segy File parameter window, you must change the value « Shotpoints starts in Byte » to 5. Then, check that XY coordinates are set to the right byte number (73 and 77). Then click next.
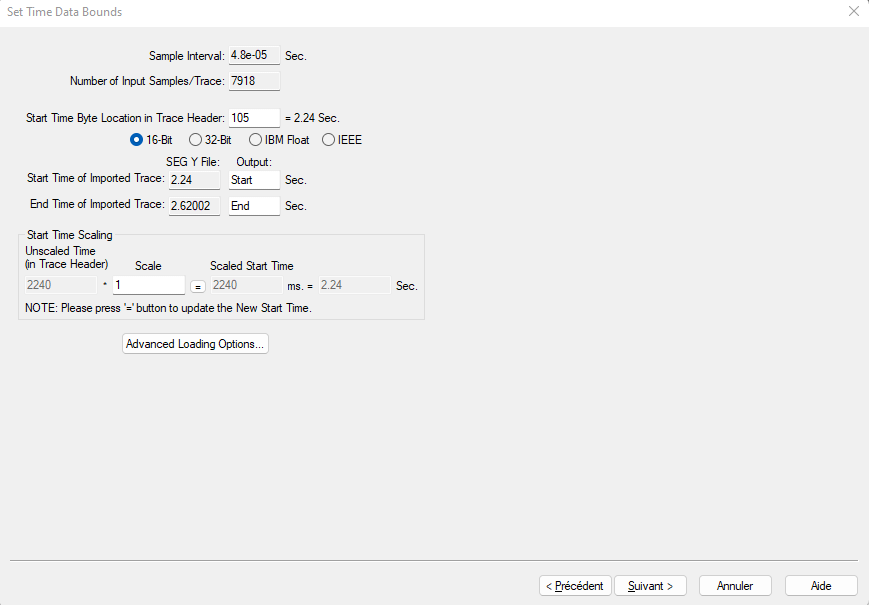
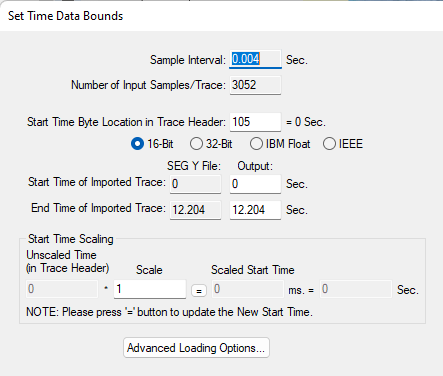
Usually you don’t have to change parameters in the « Set Time Data Bound » window except if the data are in the deep offshore. In that case click Advanced Loading Options, tick the Support variable start times and set it to the byte 109. Then click next
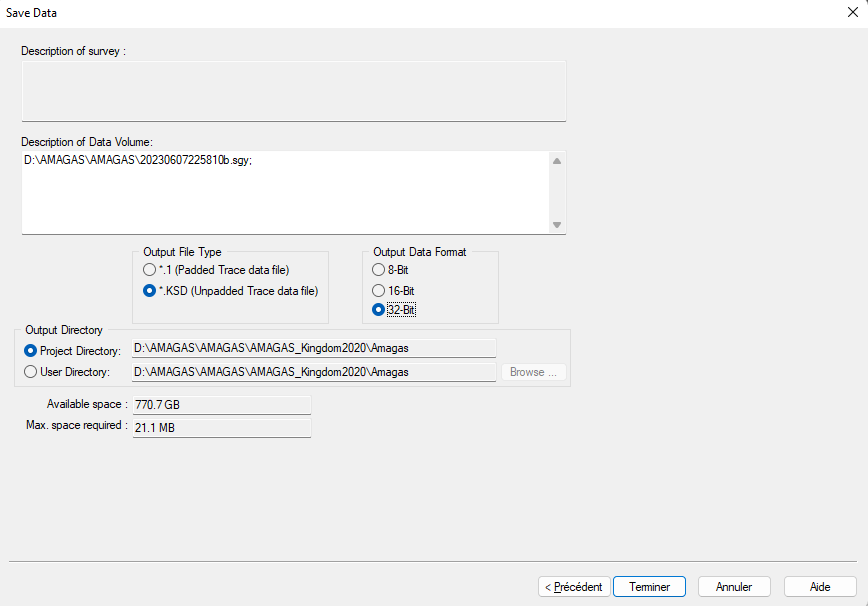
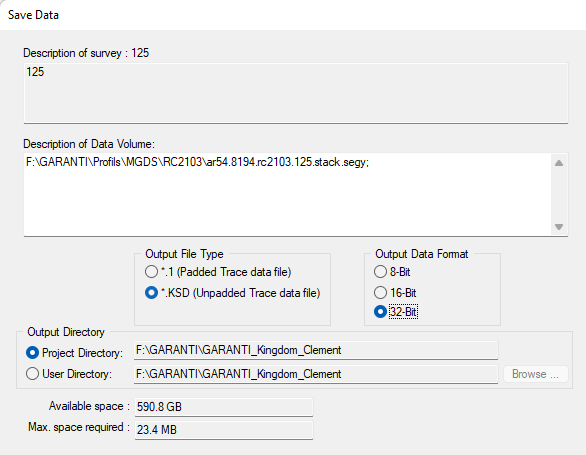
I suggest here that you set the data format to 32 Bit (best resolution) and click finish
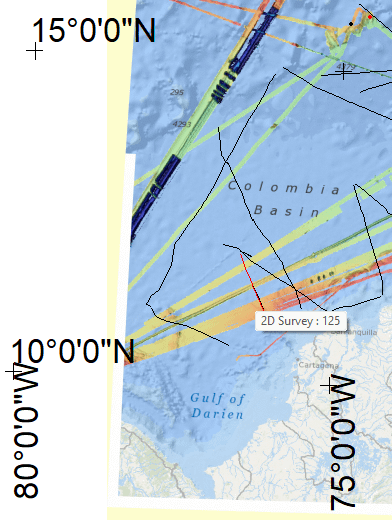
If everything’s ok, the traces are loaded and the profile is added to the tree. Double click on it to display the result and check if it’s at the right location in the base map.
COORDINATES ARE NOT IN SEGY:
It means that you must have a nav file (i.e. a navigation file). This file contains at least the line number, the shotpoints and the XY coordinates.
The principle here is to load nav file first and then to import sgy file. Please be sure that your nav file has the exact same name as the sgy file such as:

Open the nav file using a text editor. I’m using Notepad++
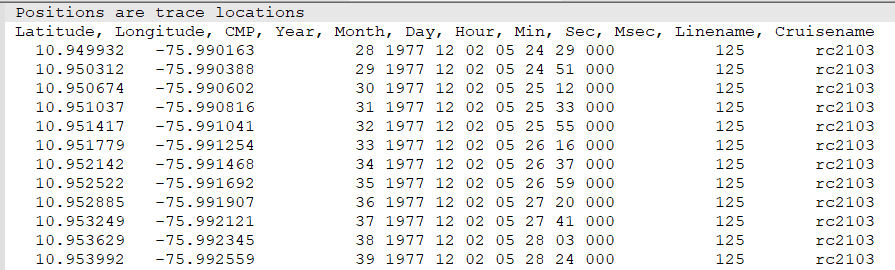
This file contains 12 columns and we need Lat, Long, CMP and Linename
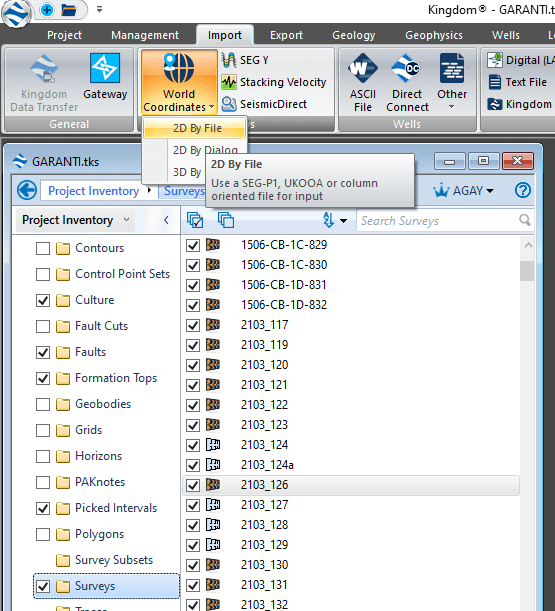
In kingdom, in the tree, right click anywhere in surveys or the import menu on top, click on « world coordinates » -> 2D by File
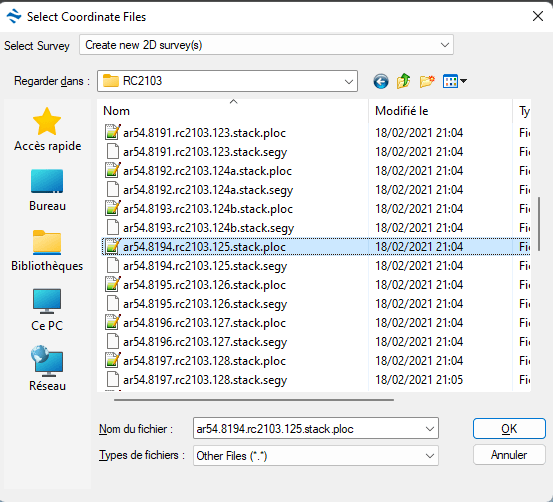
Select the nav file using « Other Files »
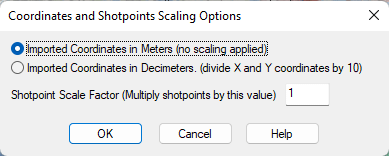
Depending on the data, a scaling could be applied here. If the data are in meters, just click OK
In the nav file the two first lines are descriptions, so the number of lines to skip is 2. Then select Line name, a colored column appears. Move it to the appropraite location and extend it to fit the column.
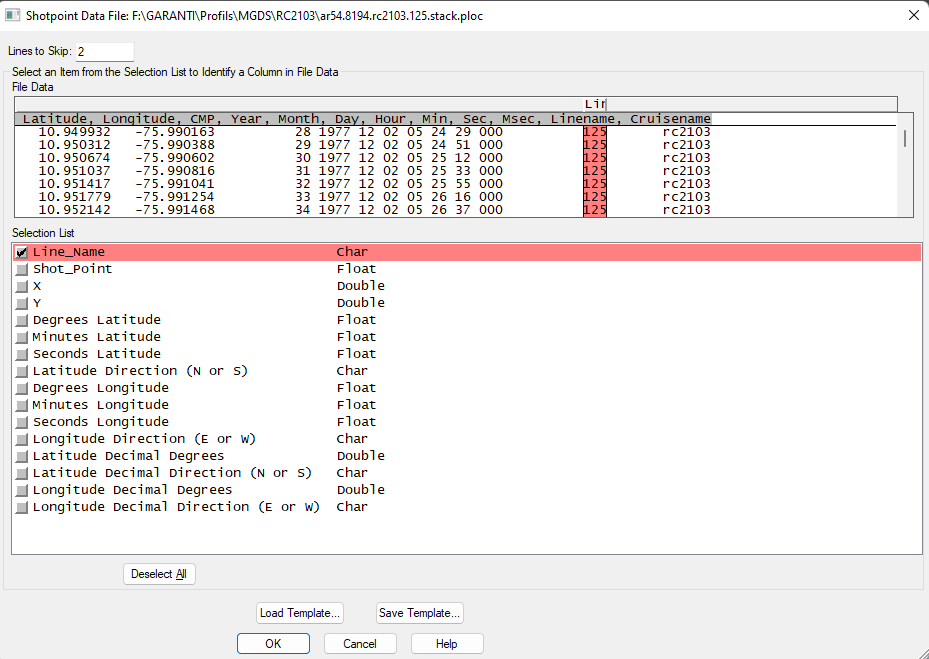
Do the same for other necessary columns such as CMP and location. In my case here, the location is in Lat/Long decimal degrees. WARNING: for CMP they can have great numbers, so expand the column to the left to better fit with large CMP numbers. If you have a large collection of seismic profiles with the same format, I suggest you create a template and you can load it each time you import nav file. Then click OK
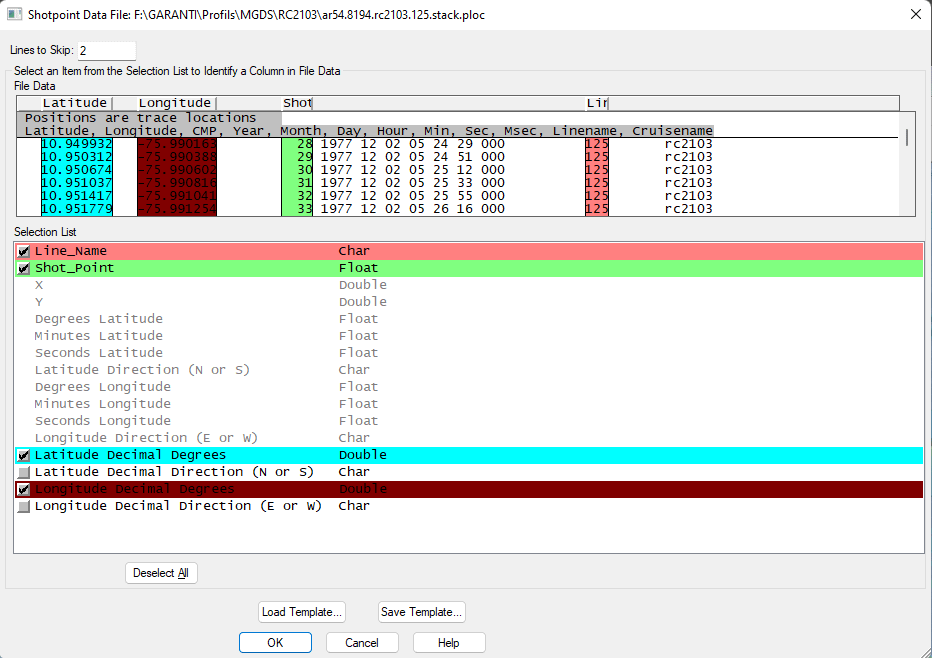
Depending on the coordinate system, kingdom asks you to choose a coordinate system for the imported nav file. In our case here, the coordinates are Lat/Long, so it’s a world geodetic system. I suggest to choose EPSG 4326, which is very common and used also in QGIS (see related section)

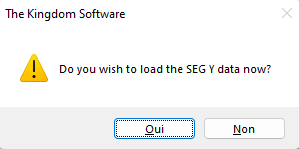
WARNING: DO not load sgy data now ! Please click no.
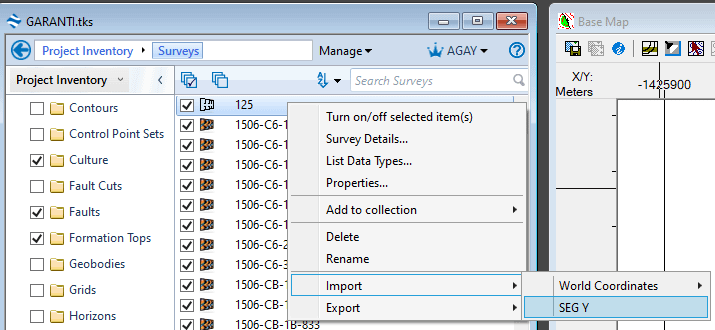
Then right click on the file name in the tree and select Import -> SEG-Y
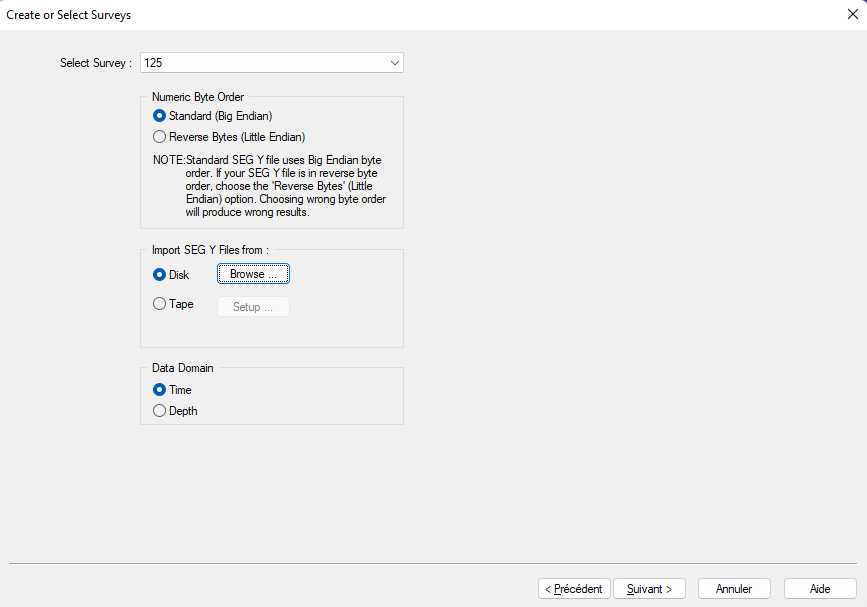
The coordinates are not embedded in the sgy file, so choose the first option « Import SEG-Y File into single 2D or 3D survey » and click next

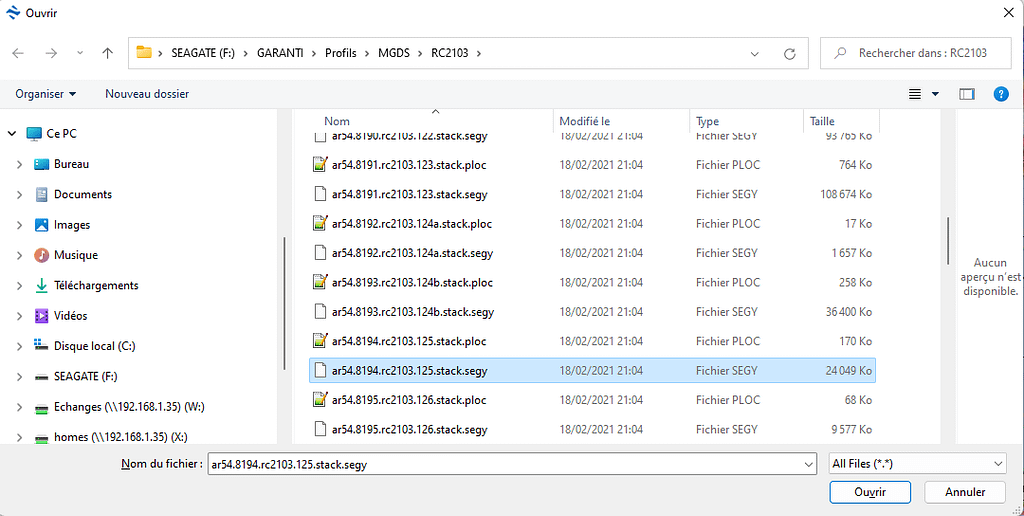
In select survey, select the profile you want to import and then click « browse »
In the type of file, select « All Files » and click on the profile with the right extension i.e. segy or sgy or seg-y depending on your data. Click open
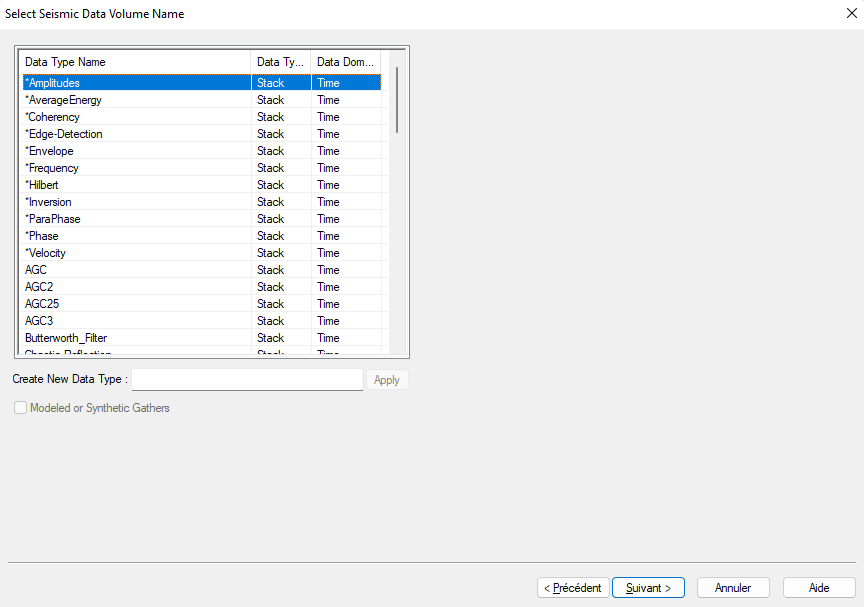
By default the data type is set to « Amplitude ». This is correct for classical seismic profiles, but you could choose or create « Energy » for Chirp profiles for instance. Click next
Select Trace Sequence Number in Header and select the appropriate byte number. This is a tricky part. To know the byte number, open either SeismicExplore (see how to set up it with kingdom in the installation manual) or use seiSee for instance.
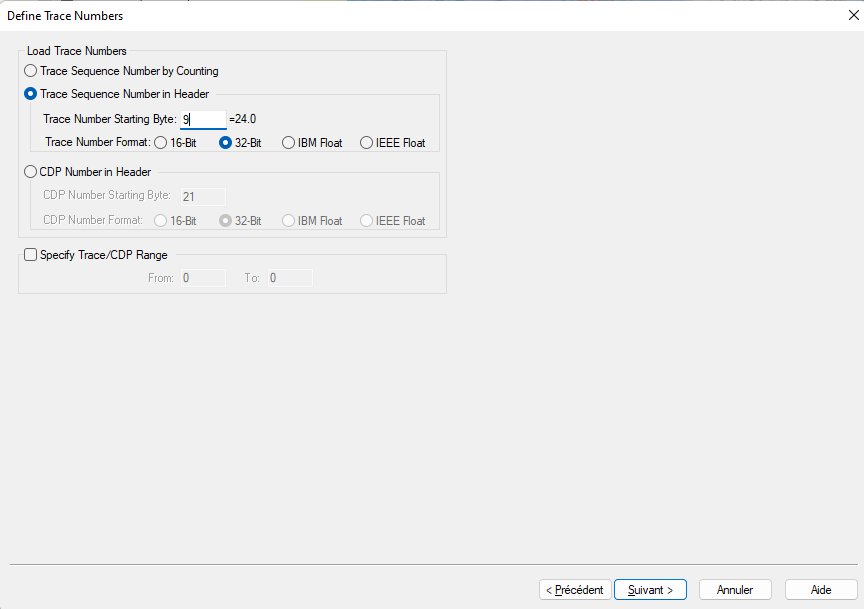
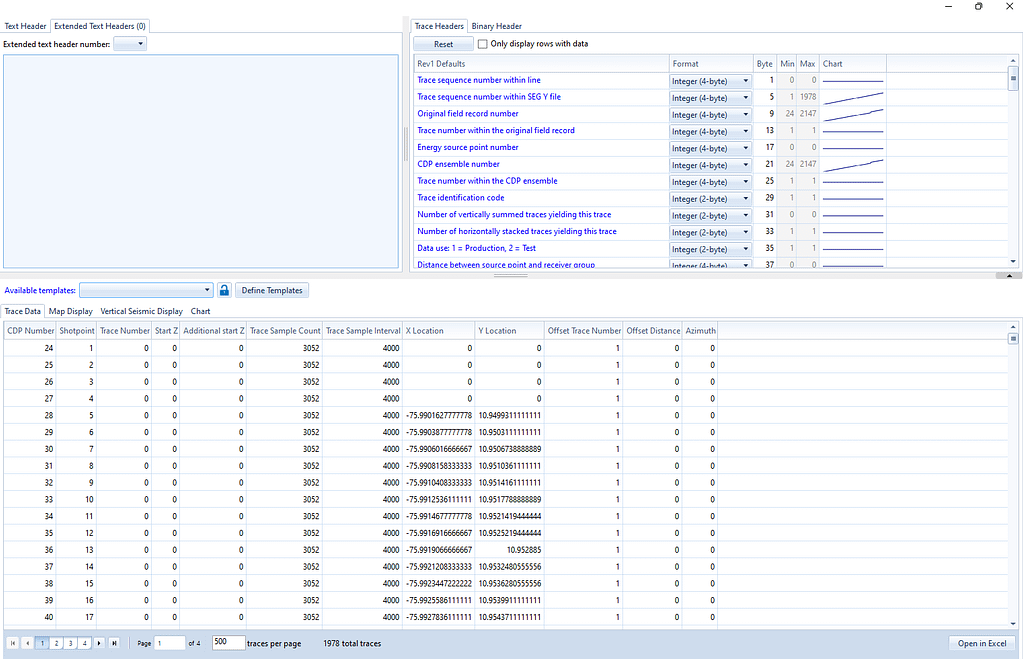
In Seismic Explore (see below) the Trace number is in byte 9 and 21. It could be different. Here the Trace number starts at 24 and ends at 2147
click next and then in the time data bounds window, click on « advanced loading options »
tick « Support Variable Start Times » and check in seismic explore bytes 105 to 109
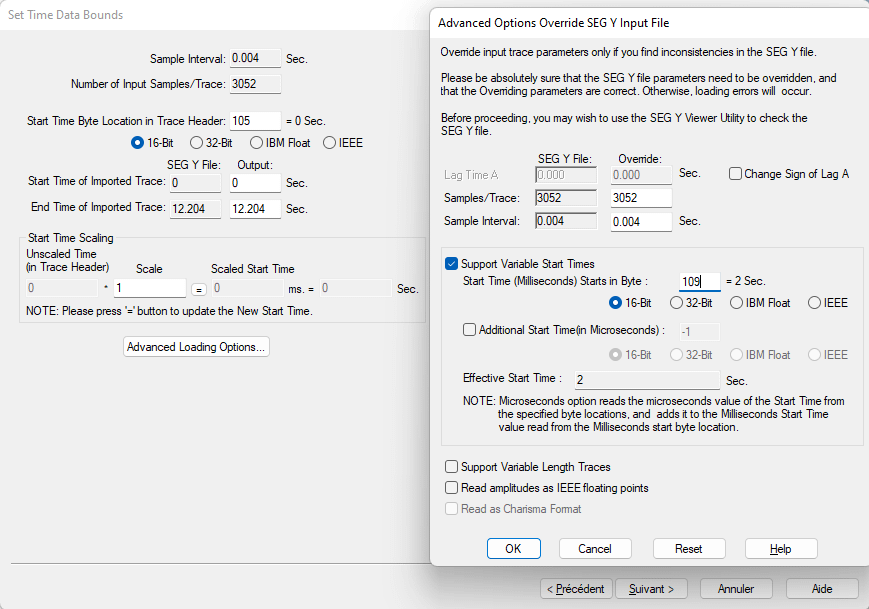
In this case, variable start time is in byte 109. then click ok and next. Select 32 bit in Output Data Format to get the best resolution.
In the last window, kingdom asks you to define a relationship. Again, check in SeismicExplore. The first line having X and Y locations is line 5 corresponding to Shotpoint 5 and CDP number 28. So, set the strating shotpoint to 5 and take a look at the increasing number: the following line is shotpoint 6 with a CDP number of 29, meaning that there is 1 Trace per Shotpoint. Then click ok.

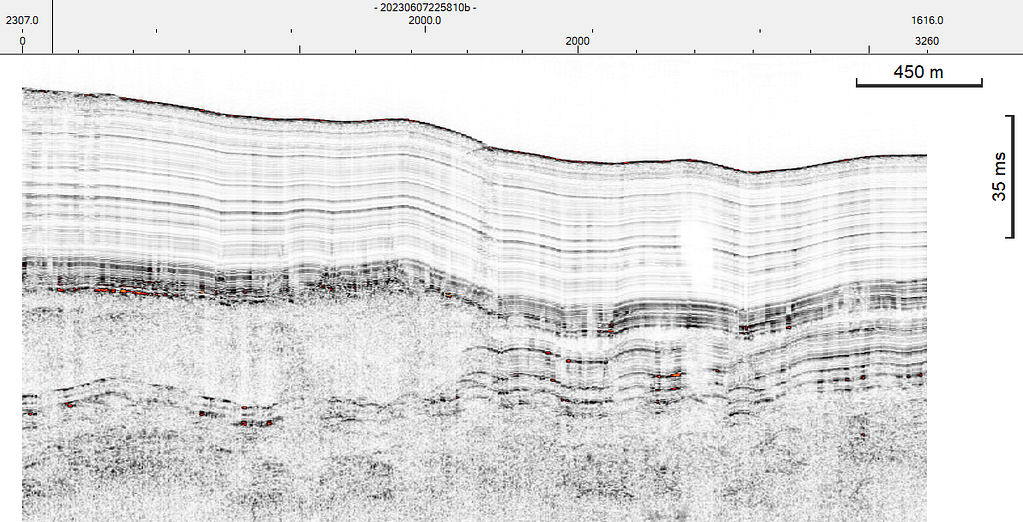
The seismic profile is now loaded. please check whether its position is correct or not on the base map.
If yes, you can double click on it to open the seismic profile and check the traces and amplitudes:
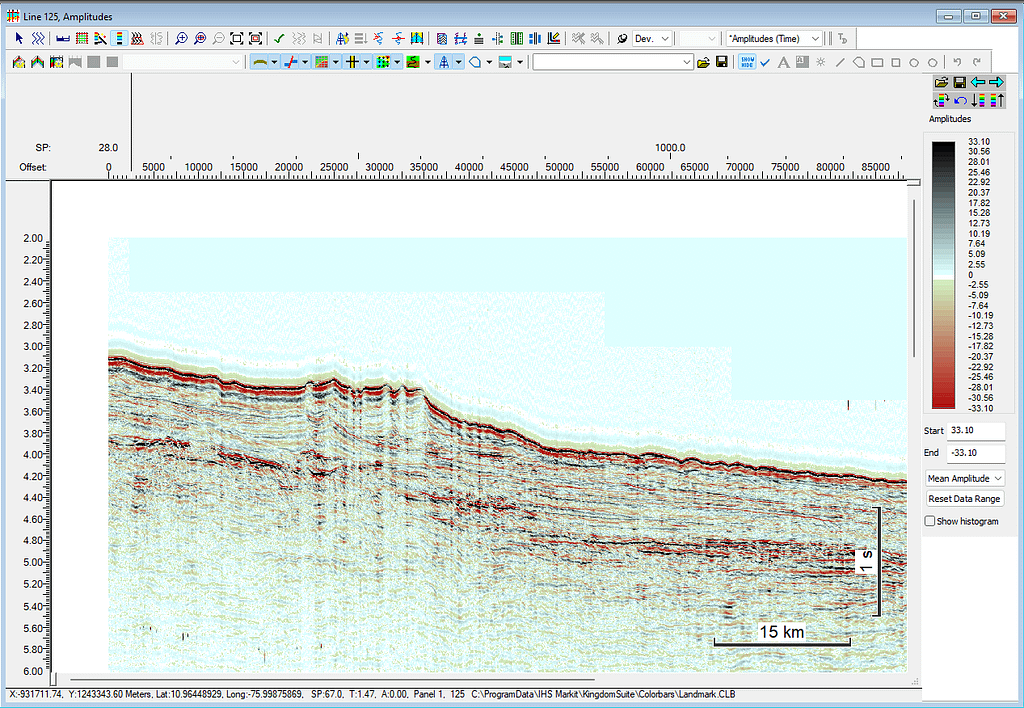
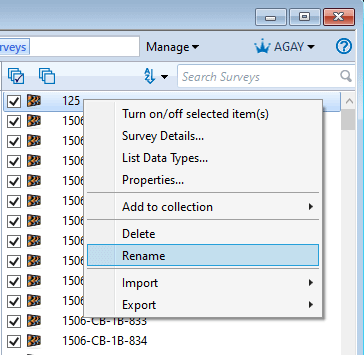
You can even rename the profile in the tree by right clicking on it
Repeat this operation for each seismic profile.
ENJOY !
Retour de ping : Kingdom: how to import sgy with a different CRS ? – AurelienG