The main aim will be to export nav file from the seismic software (here we use kingdom) and to import it in QGIS. You could also have nav files in ASCII format (i.e. txt files: start where *** are displayed). You should obtain this:

First, in kingdom right click on a profile in the main tree and select Export -> World Coordinates (=nav file).
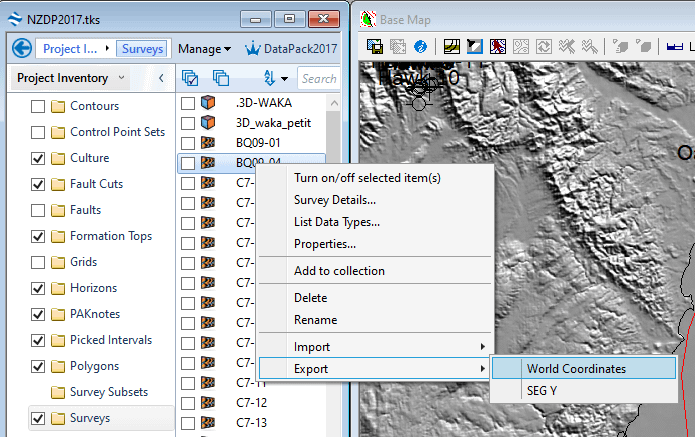
In the window that opens, select output format as « tab » (separator)
By default, the seismic profile you right-click on is selected.
Select « export world coordinates using current base map annotations » (it works only if your QGIS project has the same CRS)
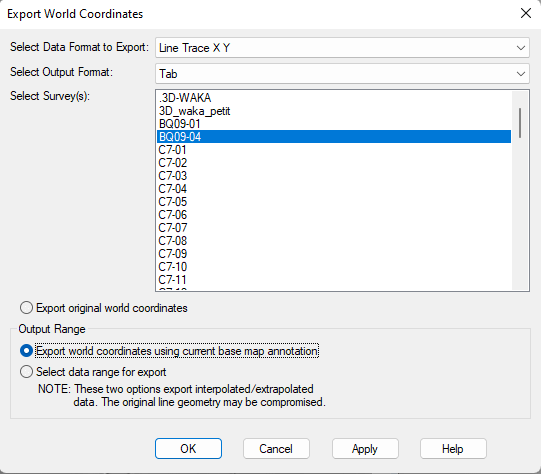
Click ok (even if a pop up window states that the geometry is compromised) and save your file as a txt file: write the name as C7-09.txt for example
Then we will use surfer, as it manages very large files (not excel). Open surfer and open your file.
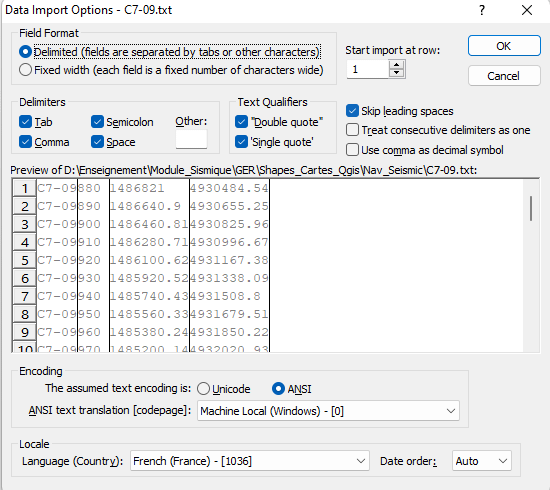
Use parameters as it is in the above window and click ok. The file should appear like this:
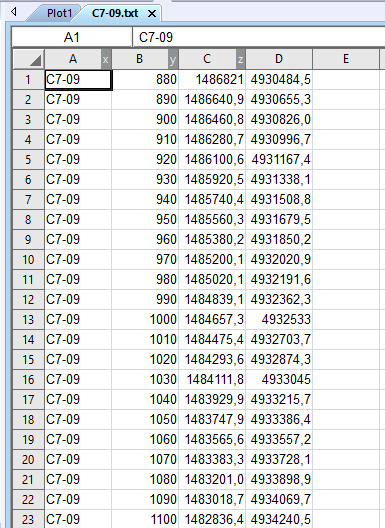
The first column is the name, the second column is Shotpoints, the third and fourth columns are XY coordinates. Then save your file ! click on file->save or save as and a window opens:
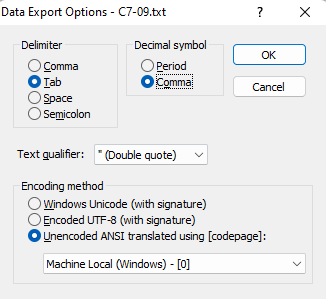
Be sure you select Tab Delimiter and Comma Decimal symbol and click ok and ok again to overwrite your txt file.
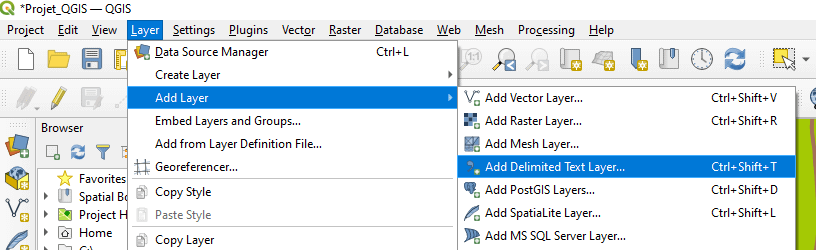
*** Open your QGIS project and click on Layer->Add Layer->Add Delimiter Text Layer
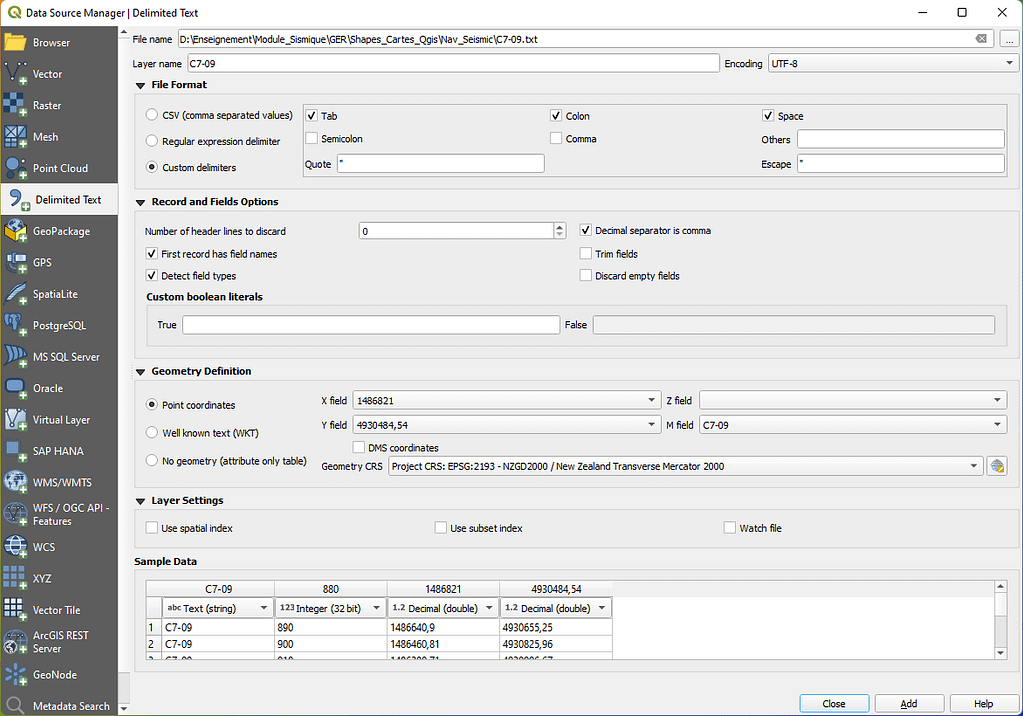
Browse to your file name and then be sure you select « Decimal separator is comma ». Select XY columns. Do not add anything in the M field. An overview of the columns is given at the bottom.
Then click « add » and close. Your nav file should appear as a collection of points:
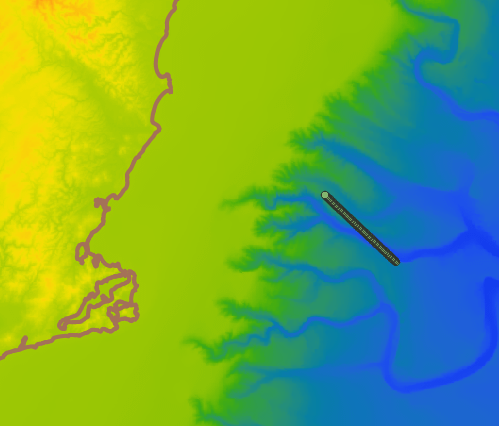
At this stage, you could leave the project asa collection of points: they represent shotpoints or CMP. You can also try to convert these points as a line.
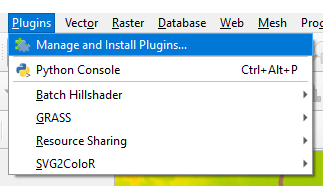
If not already in QGIS, we need to manually install the SAGA extension
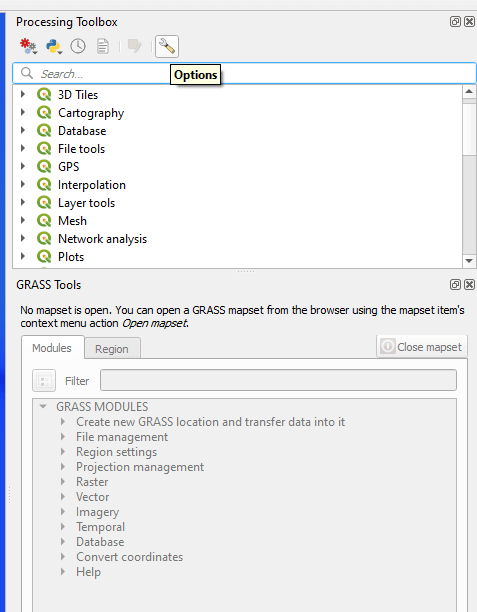
In the window that opens, select the processing saga nextgen provider

You need now to install SAGA on your computer:
https://sourceforge.net/projects/saga-gis/files/
Please note the path for installation.
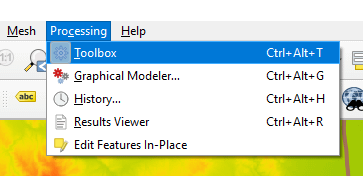
At the top of QGIS main window, click on Processing->Toolbox
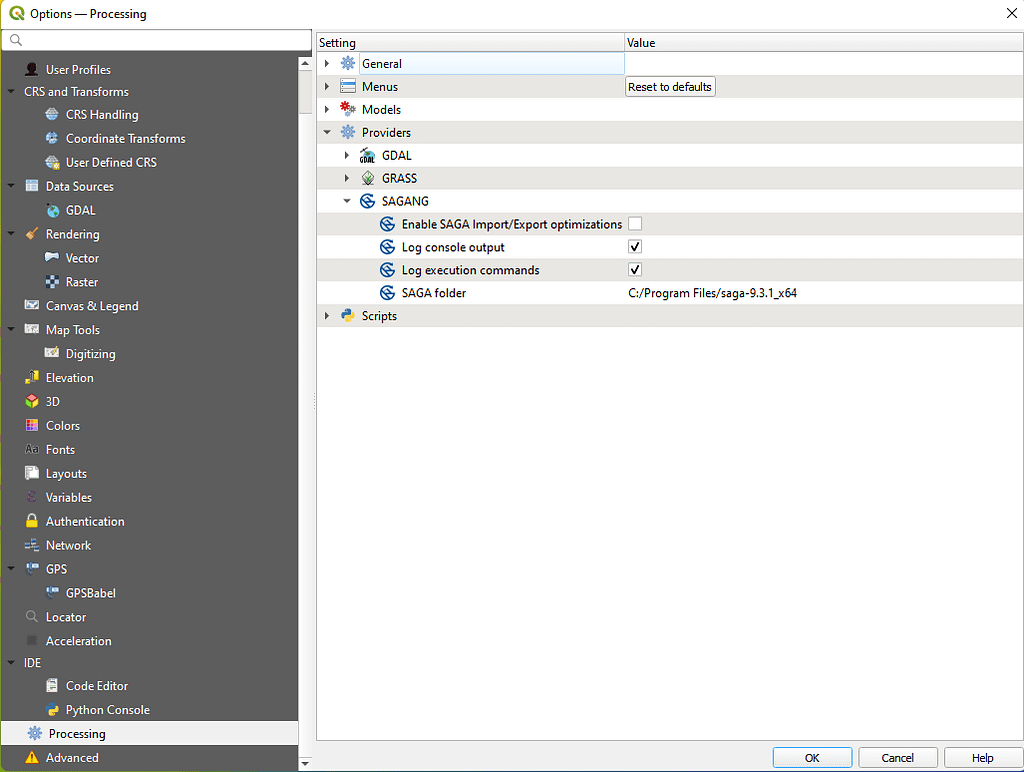
In the processing toolbox click on « options ».
In the options window, go to processing and then paste the path to your saga folder.
It’s done.
In the right pane, the toolbox displays all tools available. In the search box type « points to line and click on Convert Points to lines in SAGA extension.
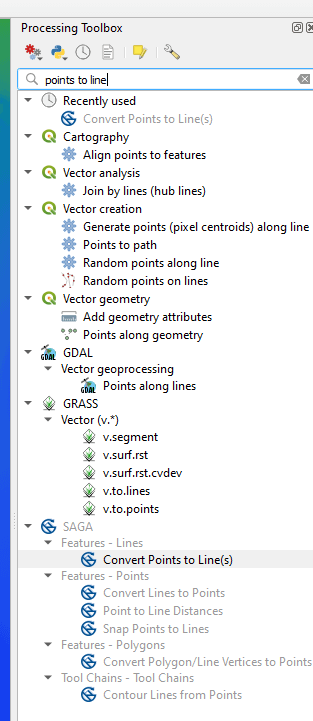
In the window that opens, select your profile and save it as a shp file.
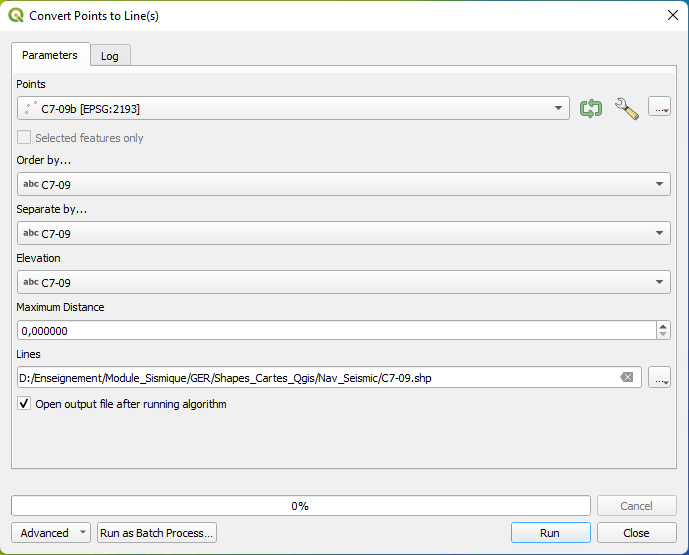
Click Run. Your profile should appear as this figure:
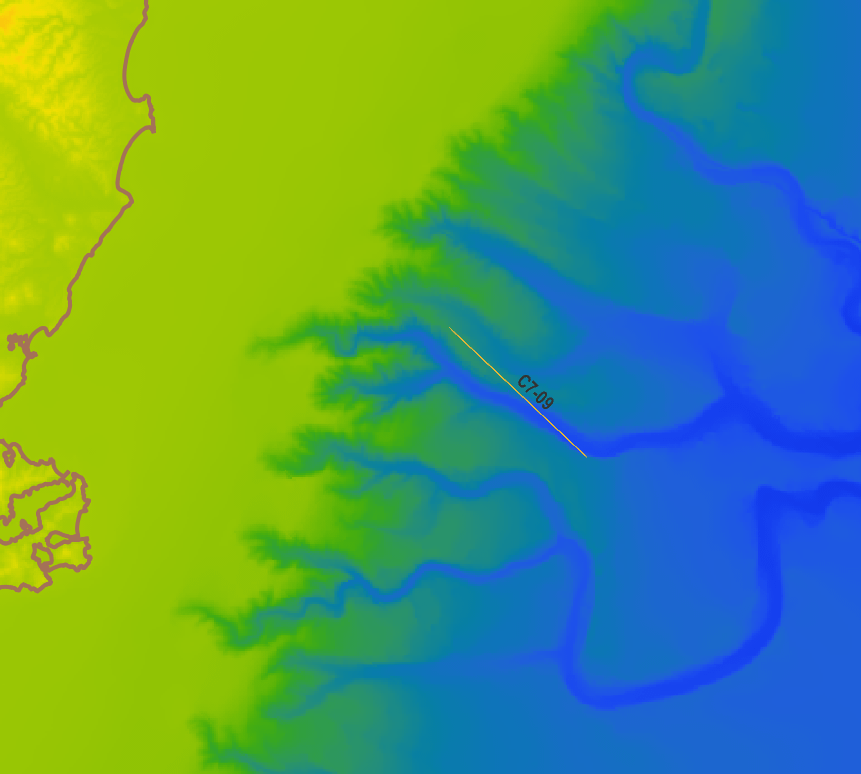
You can modify labels, size, etc…
ENJOY !